Let’s start creating your map layers by adding some aerial drone imagery to your map.
You can use the map layer function to import drone or polygon images of your site. These images can then be seen on your maps in other applications, such as RecordKeepr and MarketMakr.
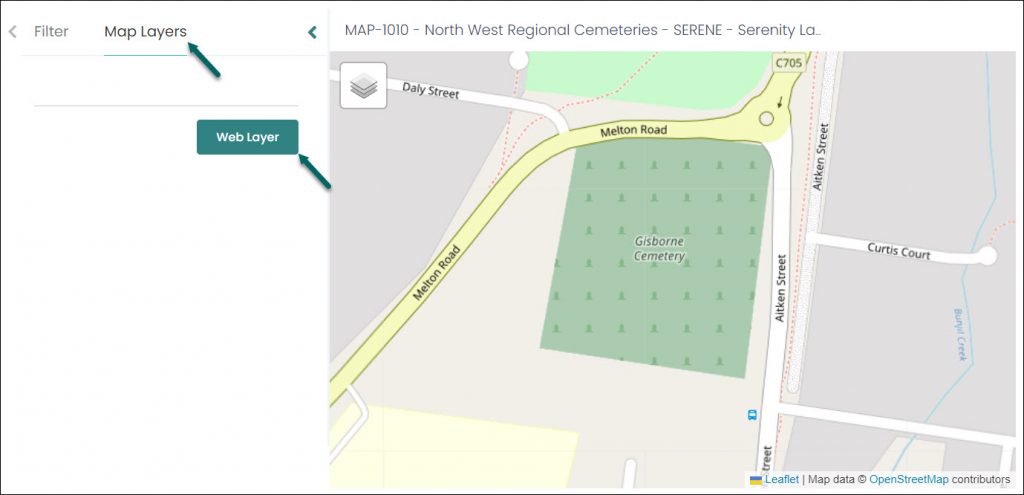
To create a new map layer, open your Map Project and click on the Map Layers tab. From here, click on Web Layer.

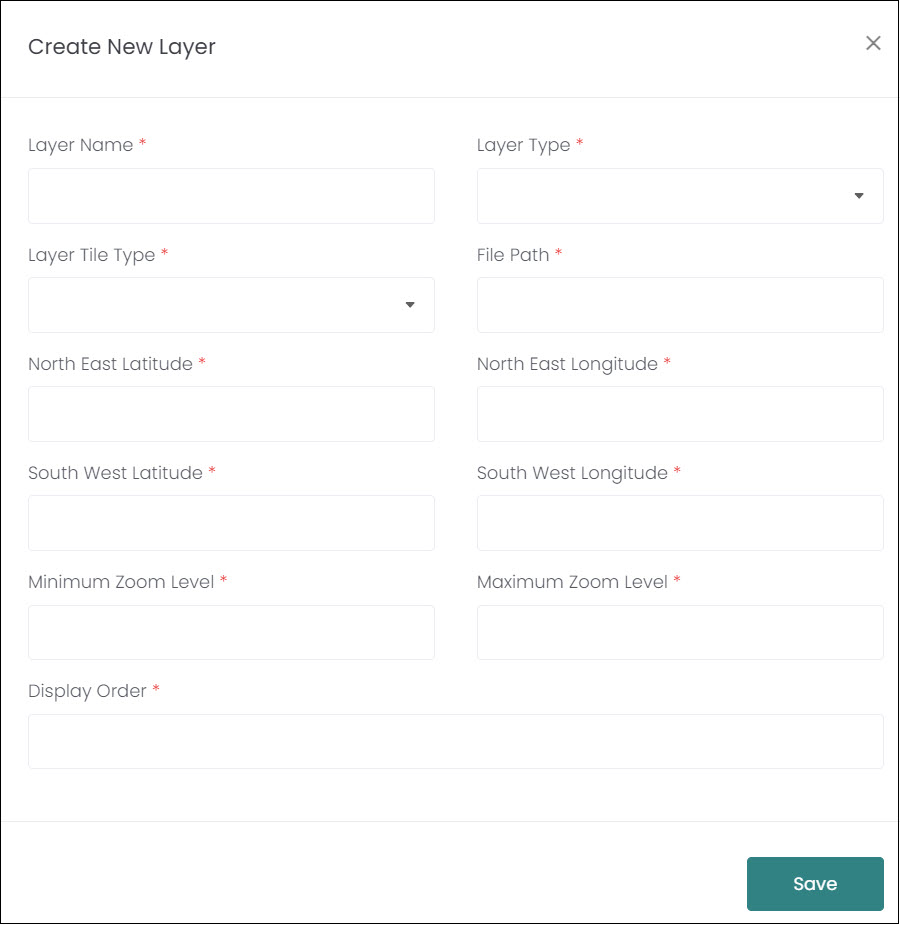
The Create New Layer window displays:

You must complete all fields on this window in order to create your new map layer.
Start with a Layer Name that reflects the type of layer you’re creating, e.g., Drone Imagery.
Next, select the relevant Layer Type from the drop-down list. Aerial is used for aerial drone imagery, Polygon is used for polygon drawing overlays.

Layer Tile Type refers to the type of image being uploaded. Simply put, we use GDAL2Tiles for aerial images, and QTiles for polygon images.

The File Path is a URL where your image is hosted. MapMakr goes to the URL and pulls the image from that file path. If OpusXenta took your drone imagery for you, then simply ask our consultants for your drone image file path!

Enter the North East and South West coordinates of your drone imagery. This will ensure the imagery is centred on the correct area of the map.

Enter the Minimum and Maximum Zoom values.
Finally, the Display Order will dictate what order the layers are listed back on the Map Layers tab.

Click Save.

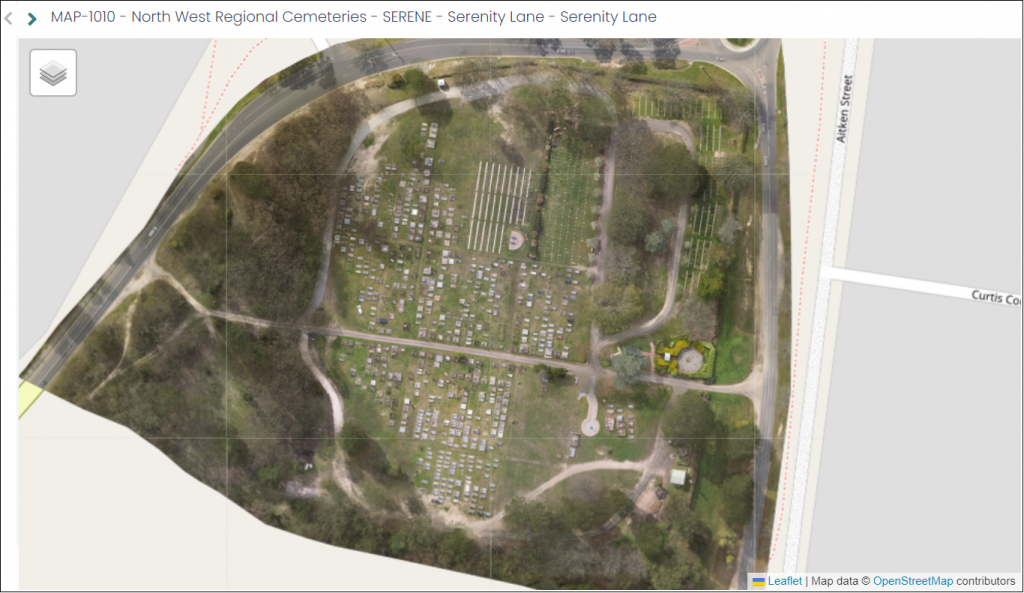
Once you’ve created the map layer, you’ll be able to see the drone image loaded in your map project.
Here’s an example of a completed map layer for a drone image:

