You can showcase different areas of your memorial garden.
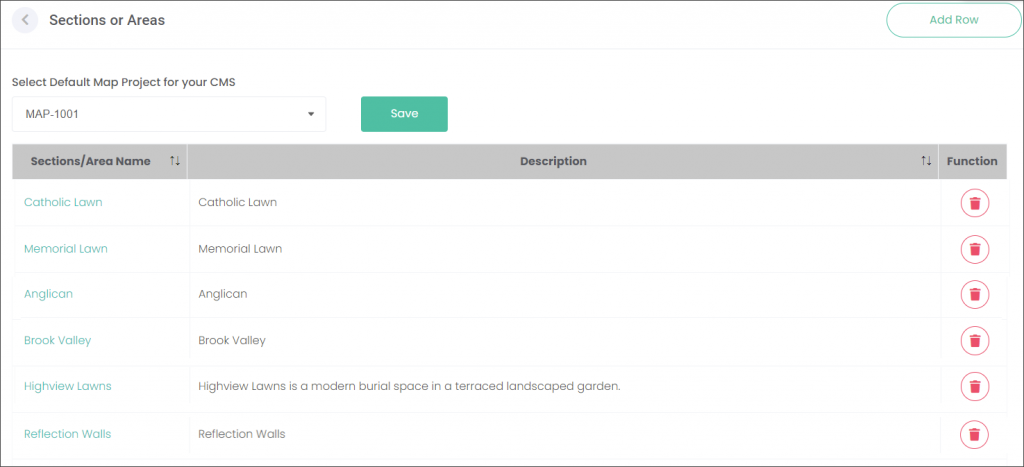
Navigate to the Manage Sites page, then press the Define Sections or Areas button at the bottom of the selected branch/site.
Firstly, you will choose which Map Project from MapMakr will be displayed on the website.
Choose a Map Project from the Select Default Map Project for your CMS drop-down list and press Save.

The way you manage the Define Sections or Areas page, depends on whether your byondcloud is integrated with byondpro.
If your byondcloud is integrated with byondpro, the information displayed in the Define Sections and Areas will transfer over from byondpro.
If byondcloud is your only OpusXenta solution, you will need to enter information about the Sections and Areas.

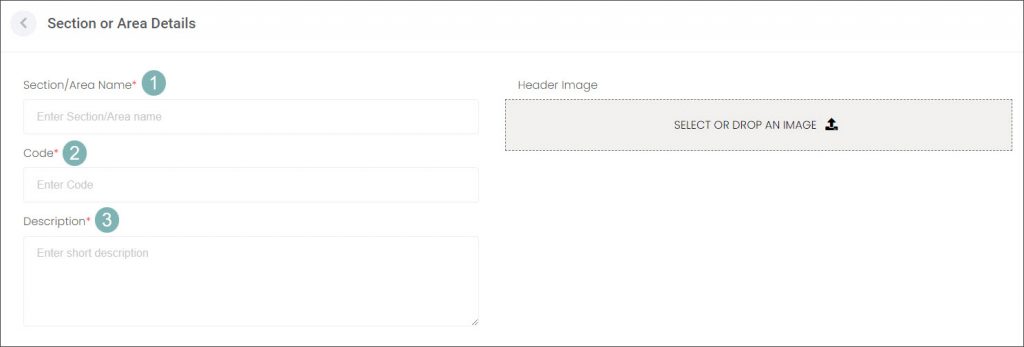
If byondcloud is your only OpusXenta solution, choose the Add Row button and describe the area by typing information in the fields provided. If you byondcloud is integrated with byondpro, click on the area hyperlink and edit the entry.
Follow the below approach when editing an existing Section or Area when adding a new one using the Add Row button.

- Type in the name of your Section or Area.
- Type in the Code of the Section or Area e.g. HGH-LAWN. If your byondcloud is integrated with byondpro this field will be auto populated and not available for editing.
- Type in a brief description of the Section or Area.
Then select an image showcasing the area and crop it to an optimal size.

Scroll down to List Special Features about the Section or Area and press the plus symbol to type in the Feature Description to highlight points of interest.
Use the up and down arrows to decide which feature will be displayed first.
Use the yellow edit icon in line with the Feature Description to update the wording.
Use the red delete button to erase the selected Feature Description.

The Map Project is saved as the one selected on the main Sections and Areas page.
Select which Plans, configured on the Maintain Plans and Pricing page, are offered on the Section or Area.

You can add additional images or videos to showcase the Section or Area. Upload or drag-and-drop images in the provided fields. Then press Save.

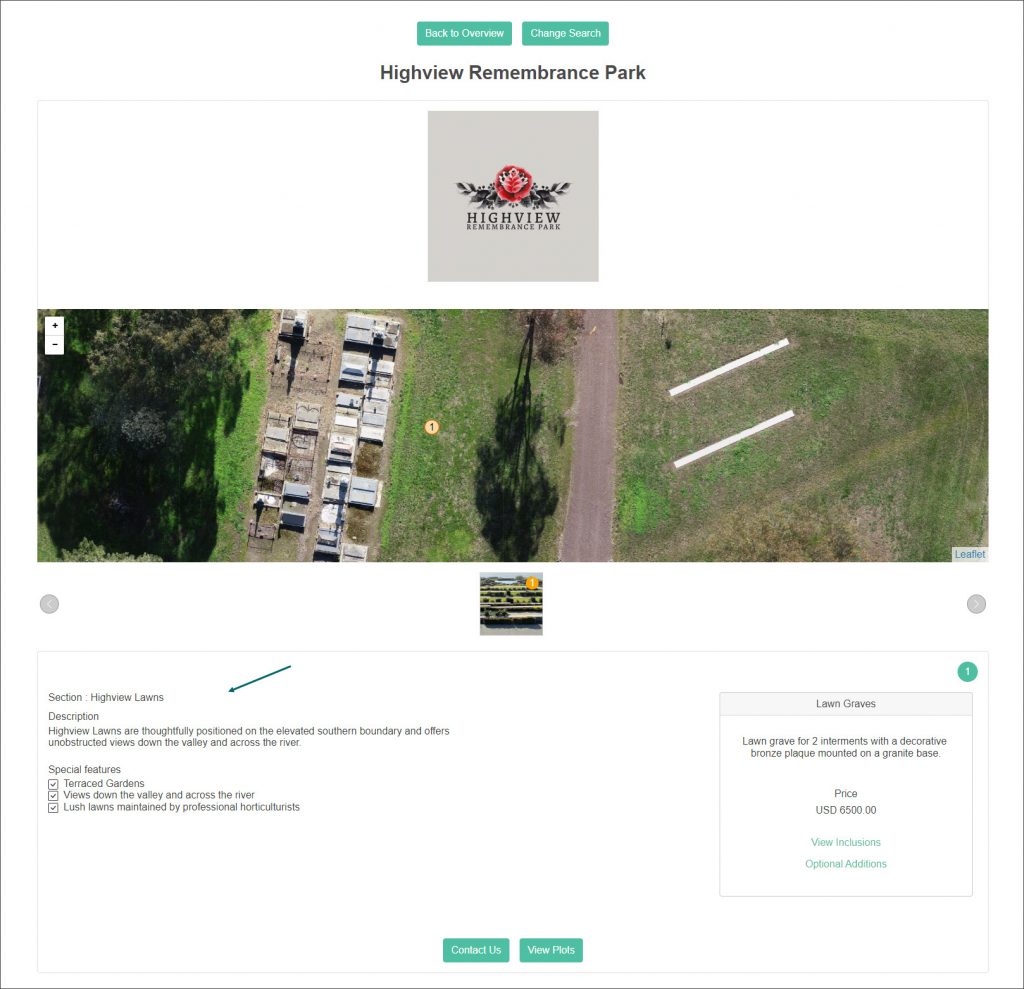
When your customers press the View Available Plots button on the Lawn Graves plan, they will be presented with the information entered on the Define Sections or Areas page such as the map, uploaded images, Description and Special Features.

