To map locations, first open your Map Project.
Then, perform a location search by clicking the Apply button under your map filters. You can use the available search filters here if you wish, or simply search for all locations.

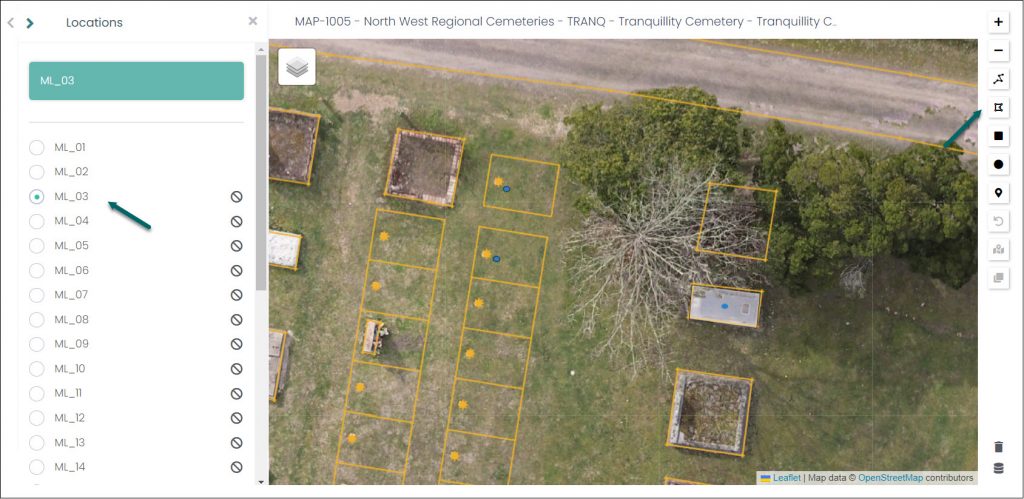
Your locations will be listed, and any locations that have already been mapped will display on the map with their markers or polygon shapes.
Let’s select one of your unmapped locations from the list. This will unlock some buttons to the right of the map that you can use to map your location.

Markers
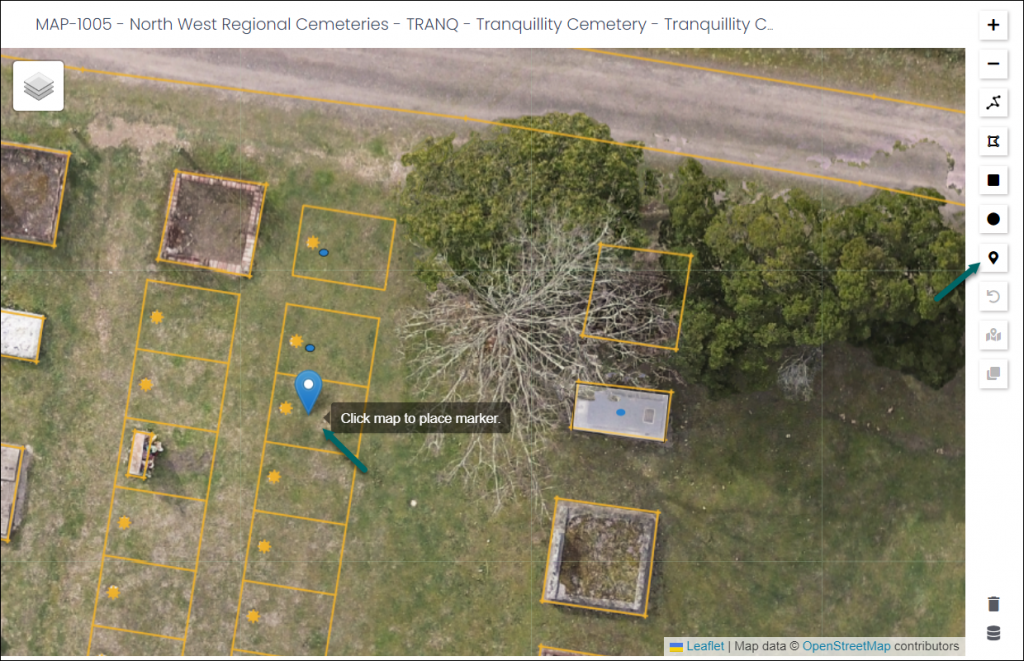
The first we’ll look at is the Marker button. Click this button to turn your curser into a blue marker pin. Now, left-click the spot on your map that you want to map your location to.

The blue marker will turn into a small blue dot. This is your newly mapped location.
If you left click on this dot, it will turn red and you can click-and-drag it into another position.

Polygon Shapes
Select another unmapped location. Next, you have a few tools you can use to map your location as a polygon shape.
Let’s look at two examples of polygon tools we can use, the Polyline and the Polygon tools.
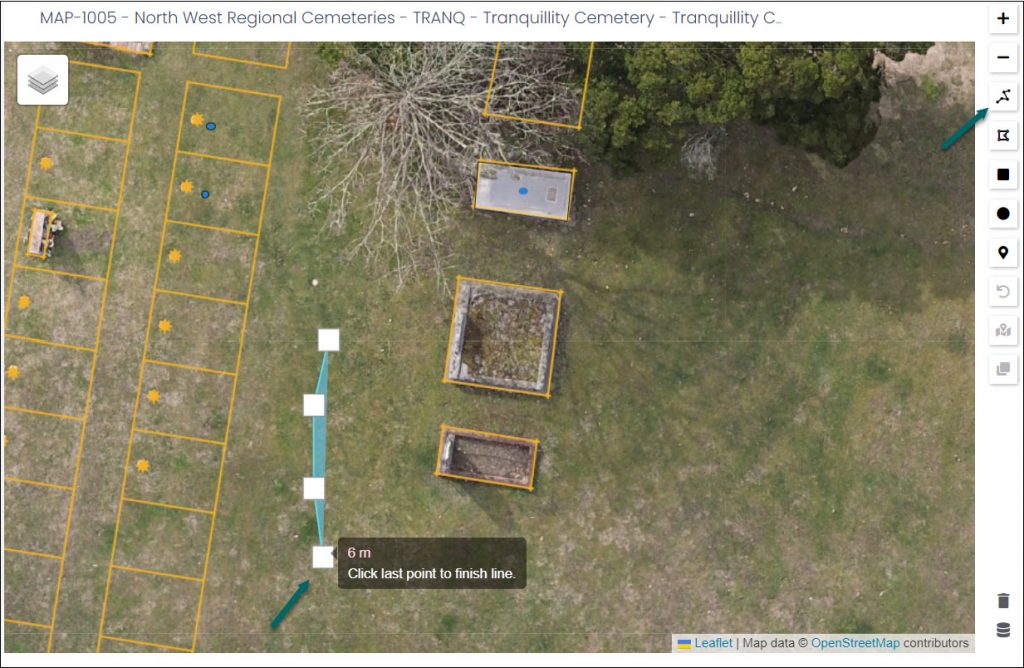
The Polyline lets you draw a series of points in a line. Choose the starting point of your shape on the map and left-click. Each consecutive left-click will be another point along your wall, allowing you to create angles in your shape.
When finished, click the final point a second time, which will close your shape.

This tool is useful if you’re mapping a memorial wall, for example. In the Assign Multiple Locations article, you will learn how you can then apply all your wall niche locations to that one Polyline shape.
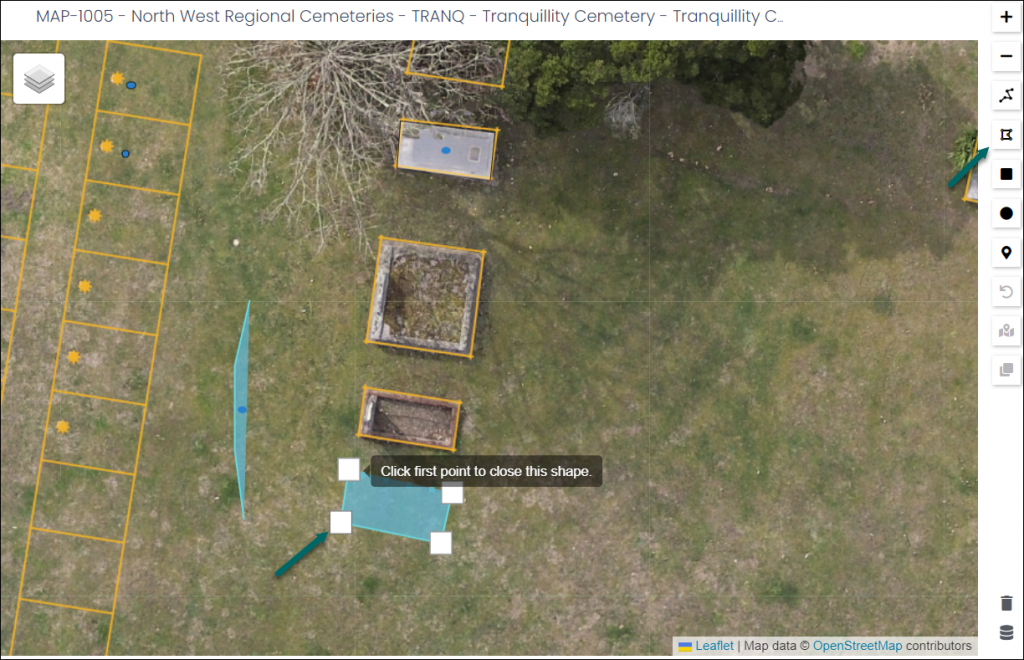
The Polygon tool functions much the same way, except this tool completes the shape by left-clicking the first point. This creates closed shapes, rather than open lines.

This Polygon tool is useful for drawing shapes around your graves and other locations.
Once locations are mapped as polygon shapes, you can rotate, re-shape, resize and move the shape by right-clicking on the shape. When finished, right-click on the shape again and select Stop Editing.
From this menu, you can also Delete polygons and markers.

You can also clone your polygon from this menu, but this will be covered in the Clone Polygons article.
Clear All and Export
If you wish to delete all your mapped markers and polygons, you can click the Clear All button on the bottom right of the screen. This will only erase the markers and polygons. You will still have your list of locations.

To export the map project information to a CSV or Excel file, click on the Export icon.

This will open the Download Location Data pop-up.
Select the File Format (xls, xlsx, csv, or GEO JSON), which Coordination Order you want the details to display (Longtitude – Latitude, or Latitude – Longitude), and the Export Options you wish to apply (All feature objects, Map markers only, or Polygons only).
Click Download to generate the export file.

